10 Creative Ways to Update Your Kitchen Cabinets

Updating your kitchen cabinets can transform the look and feel of your space.New hardware is an easy way to breathe new life into your cabinets. Replace the existing knobs or pulls with modern brushed brass or matte black hardware for an updated look. Or for a minimalist feel, install recessed finger pulls.

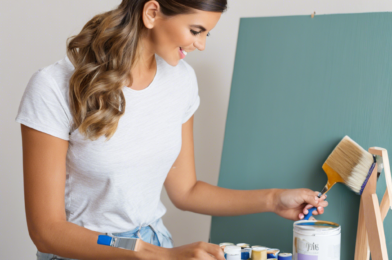
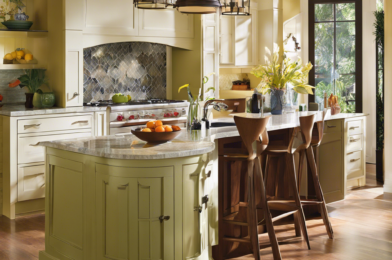
A fresh coat of paint is one of the most dramatic updates you can make. Painting your cabinets a trendy color like navy blue or forest green can make a bold statement. For a more neutral but stylish option, consider shades of gray. Be sure to clean and lightly sand your cabinets, then apply a primer followed by two coats of paint.

Replace just the cabinet doors for an update that won’t break the bank. Cabinet doors see the most wear and tear, so switching them out for new doors in a different style or material can make your kitchen look brand new. You can find replacement doors to match your existing cabinet style or choose a new style altogether.

Install new molding to transform plain cabinet frames. Adding crown molding to the top of cabinets helps draw the eye upward and creates a custom built-in look. For shaker-style cabinets, add recessed panel molding. These simple trim pieces provide dimension and detail.

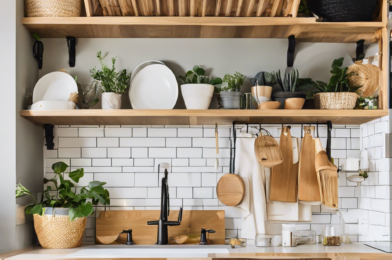
Replace or refinish your cabinet shelves. Swap out worn, mismatched shelves for new wood or glass shelves. Or have your existing shelves refinished or laminated for a sleek, uniform appearance. This subtle upgrade makes a big impact on the overall look and functionality of your cabinets.

Stain or repaint your cabinet interiors. Don’t forget about the inside of your cabinets! Staining, painting, or wallpapering your cabinet interiors is an easy way to refresh this often-overlooked space. Use a complementary or contrasting color to enhance your cabinet exteriors.

Install new cabinet lighting. Under-cabinet and interior cabinet lighting illuminates your workspace and highlights your cabinetry. LED strip lights or puck lights are easy to install and provide bright, energy-efficient lighting.

Replace outdated cabinet hardware. Swapping out old hinges and drawer slides for new hardware freshens up your cabinet functionality and prolongs the life of your cabinets. Look for high-quality, full-extension drawer slides and soft-close hinges for the best performance.

The Ultimate Guide to Organizing Your Garage

A well-organized garage can make your life so much easier. Start by decluttering and getting rid of anything you do not need. Have a garage sale, donate to a local charity, or throw away broken and unused items. Once decluttered, you’ll have a blank slate to work with.

Install sturdy shelving for storage. Wall-mounted shelving is ideal for garages since it keeps things off the floor. Choose shelving that can hold a lot of weight, like metal or heavy-duty wood. Use the shelving for items you access frequently, like tools, gardening equipment, and sports gear. Label boxes to make items easy to spot.

Hang as much as possible. Bikes, hoses, tools, and other equipment can all be hung from the ceiling or walls. This frees up floor space and keeps things organized. Buy hooks, racks, and wall mounts to keep everything in place. Make sure anything hung from the ceiling is secured properly so it does not fall.

Designate areas for different purposes. Have a zone for tools and equipment, one for recreational items, one for trash and recycling, and one for your vehicle. Use floor markings, signs, and labels to define the separate areas. This makes it easy for everyone to put things back in their proper place.

Keep a trash and recycling bin in your garage. Empty them regularly so waste does not pile up. Place them near the door into your home for convenience. Have separate bins for hazardous waste as well to dispose of batteries, paint, and other chemicals properly.

Invest in cabinetry and drawers. Cabinets are ideal for small parts, tools, and other equipment. Drawers on wheels or casters can be rolled around the garage as needed and then pushed back into place. Choose storage furniture that is specifically designed for garages and can withstand temperature changes.

Keep a portable table or workbench. A table gives you a space for projects, repairs, and hobbies. Look for a foldable or collapsible table that can be put away when not in use. Have good task lighting, power outlets, and ventilation over the work area.

Sweep, mop, and vacuum regularly. While a garage will never be as clean as the inside of your home, keeping it swept and mopped makes a big difference. Remove dirt, leaves, and debris to prevent messes from building up. Vacuum shelves and cabinets when you notice dust building up. A clean garage is a safe and organized garage.

How to Create a Cozy Outdoor Living Space

Creating a cozy outdoor living space is a great way to extend your home’s livable area and take advantage of nice weather. Start with comfy seating. Choose weather-resistant furniture like wicker chairs, a loveseat, or a sofa along with cushions that can stand up to the elements. A small table between pieces of furniture provides a place for drinks, books, or snacks.

Add decorative touches to make the space feel cozy and inviting. String lights, lanterns, or a fire pit can provide ambient lighting for evening use. An outdoor rug defines the space and provides comfort underfoot. You might also include greenery like potted plants, flowers, or small trees. A fountain or birdbath adds visual and auditory interest.

Provide shelter from the sun and elements. A pergola, gazebo, or awning helps shade the space from harsh sunlight. You can also use umbrellas over tables and seating areas. Side panels, curtains, or screens give protection from wind and light rain.

Include creature comforts to keep guests satisfied. Stock a small bar area with glasses, a cooler for drinks, and bottle openers. Have a place for a music source, speakers, and device charging. A fan or space heater extends the usefulness of the area.

Keep the space clean and clutter-free. Provide storage for tools, gardening equipment, cushions, and other accessories when not in use. A receptacle for trash, recycling, and food waste makes cleanup easy. Regular sweeping, wiping down of surfaces, and maintenance keeps the area looking its best.

With some time and effort, you can create an inviting oasis in your own backyard. Keep things cozy, comfortable, and convenient and your outdoor living space will become a favorite place to relax and entertain. Spending time outside in nice weather is a simple pleasure, so make the most of it with a space tailored to your needs.

5 Simple Woodworking Projects for DIY Enthusiasts

Woodworking is a rewarding hobby that produces useful and decorative items for your home. For DIY enthusiasts looking to get started, here are 5 simple woodworking projects that are perfect for beginners.

A wooden box is a simple but stylish project. All you need are six wooden boards of the same thickness, wood glue, nails or wood screws, and sandpaper. Cut the boards to size, then assemble into a box shape with wood glue and nails. Sand down the surfaces and edges for a smooth finish. You now have a handy storage box for anything from mail to blankets.

Picture frames are another easy woodworking project for beginners. Buy pre-cut wooden boards, then cut to fit your picture size. Assemble into a frame with wood glue and clamps or nails. You can customize the frame by routing the inner edge or adding wood appliques. Stain or paint the frame to match your decor.

A simple wooden tray makes a great catchall for keys, mail, or other small items. All you need is a single wooden board, wood glue or nails, and handles. Cut the board to a rectangle, round the corners, then attach two wooden handles on either end. You can leave the tray plain or decorate by burning, painting, or decoupaging the surface.

A wooden stool provides extra seating and also makes a great plant stand. For a simple three-legged stool, cut three wooden legs of the same thickness and length. Attach the legs together at the top with wood glue and nails to form a stable base. Then cut a circle of wood for the seat and attach to the top of the legs.

Finally, wooden coasters make a great beginner project and useful gift. Cut circles of wood, then sand the edges smooth. You can burn or stencil designs onto the surface, or simply stain or seal the wood. Attach felt pads to the bottom of each coaster to protect tables. These simple but attractive coasters make a perfect starter project for any woodworking beginner.

The Beginner’s Guide to Basic Plumbing Repairs

Plumbing issues are some of the most common problems homeowners face. Leaky faucets, clogged drains, and running toilets can cost money and cause damage if left unaddressed. While some plumbing repairs require a professional, many minor problems can be fixed with some basic tools and DIY know-how.

A leaky faucet is one of the easiest plumbing repairs to make yourself. Start by turning off the water supply to the sink by locating the shutoff valves under or near the sink. Inspect the faucet to determine the cause of the leak, which is often a worn out washer or O-ring inside the faucet. You can find replacement parts at your local hardware store. Disassemble the faucet following the directions in the product manual to access and replace the worn out parts. Put the faucet back together, turn the water on, and check for any remaining drips.

Clogged drains are annoying but often easily unclogged. For slow drains, try using a plunger to dislodge any stuck-on debris. Pour a mixture of baking soda and vinegar down the drain, then flush with boiling water after 15 minutes. As a last resort, you may need to remove the pipes underneath the sink to clear out the clog. Make sure to place a bucket underneath to catch any spilled water. Remove any hair or soap scum clogs with your fingers or pliers and reassemble the pipes.

Running toilets can waste thousands of gallons of water per day. Check that the flapper valve at the bottom of the tank is closing properly after the tank fills. If not, the flapper valve likely needs replacement. Turn off the water supply, flush the toilet, and sponge out the remaining water in the tank. Take the old flapper valve with you to the store to buy a replacement, then install the new one by simply popping it into place. Turn the water back on and test to make sure the replacement flapper valve closes fully after each flush.

With some basic tools and patience, many common plumbing issues can be resolved without calling a professional. However, for major repairs or anything involving gas lines, it’s best to call a licensed plumber to ensure it’s handled properly. Do-it-yourself plumbing repairs can save money, but safety should always come first.

How to Paint Like a Pro: Tips and Tricks for a Flawless Finish

The key to achieving a professional-looking paint job is preparation. Clean the walls thoroughly, repair any damage, then apply a primer. Let the primer dry completely. For the best results, lightly sand the walls with fine-grit sandpaper to provide “tooth” for the new paint to adhere to. Wipe away dust with a tack cloth.

Select a high-quality paint in a finish suited to your needs: flat, eggshell, satin or glossy. For most rooms, an eggshell or satin paint works well. It provides a subtle sheen that stands up to washing. Apply at least two coats of paint, waiting 2-4 hours between coats. Use a brush to cut in edges and corners, then roll on the rest of the paint with a roller. Extend each stroke from ceiling to baseboard using a smooth, continuous motion.

Use a quality angled brush for cutting in and a roller with a thick, plush nap for large, open areas. Load the roller fully but not dripping, and roll it over a paint tray grid a few times to distribute the paint evenly before applying to the wall. Reload the roller as needed to keep an even coat of wet paint on the wall. Roll from the top of the wall down, using long, even strokes.

Blend in each new section with light, feathering strokes. Overlap each roller pass by several inches to avoid lap marks. Roll in different directions for the second coat. For trim, doors and cabinets, use a brush to paint edges and corners, then fill in the middle with a small roller or brush. Extend each brushstroke from natural stopping point to natural stopping point for the best results.

Take your time and don’t overbrush. Apply enough pressure to spread the paint evenly, but not so much that you create bubbles. two or three coats of paint, waiting for each to dry completely between applications, will provide better coverage than a single thick coat. Thicker paint is more prone to drips and brush marks.

Paint the trim first, then the walls. Use painter’s tape for clean, sharp lines along trim, ceilings and baseboards. Remove the tape as soon as you’re done painting while the paint is still wet to get the crispest edge. Touch up as needed where the tape edge meets the wall.

For the final coat, paint from ceiling to baseboard without stopping to avoid lap marks. Maintain a wet edge as you go. If you do have to stop, end in a corner or natural breaking point. When the entire wall or room is complete, inspect it from multiple angles to ensure an even coat and spot-check for any missed areas or drips before the paint dries.

Take your time with the final details. Use a small angled brush to paint areas around trim, windows, doors, and baseboards. Check that cabinet doors and drawers are fully covered. Once everything looks good, sit back and enjoy your flawless, professional-looking paint job! With some patience and the proper technique, you can achieve amazing results.

10 Easy DIY Projects to Upgrade Your Home on a Budget

Add molding to your walls. Molding instantly transforms a space and adds architectural detail. You can find inexpensive molding at your local hardware store and install it yourself using construction adhesive and a miter saw. For a rustic look, consider wood planks instead of traditional molding.

Paint your interior doors. A fresh coat of paint on your interior doors can brighten up your space. Clean the doors to remove any dirt or debris and apply a primer if needed. Then paint the doors in your color of choice. For extra pop, consider painting the doors a contrasting color from the walls.

Replace cabinet hardware. New cabinet hardware, like knobs and pulls, can make your kitchen feel brand new again. Remove the old hardware and fill in any holes with wood filler. Browse hardware options at your local home improvement store and choose a style you like. Install the new hardware and enjoy your updated cabinets!

Refinish or paint furniture. Are you bored of the furniture you have? Don’t buy new—refinish or repaint what you already own. Clean and sand the furniture to rough up the surface. Apply a primer, then paint or stain in your desired color. You’ll be amazed at how refreshed your furniture looks with a new finish.

Install wall sconces. Wall sconces are an easy way to add ambient lighting to your space. Choose a location for your sconces and hold them up to the wall to determine the proper height. Install the mounting hardware, then attach the sconces and turn them on to illuminate your room.

Replace outlet covers. Dingy or yellowed outlet covers detract from a room’s decor. Fortunately, outlet covers are inexpensive and easy to swap out yourself. Turn off the power to the outlets at the circuit breaker. Remove the old outlet covers with a screwdriver and attach the new covers, then turn the power back on. Your outlets will look as good as new!

Hang curtains. New curtains can transform the look and feel of a room. Measure your window to determine the proper curtain length and width. Buy curtain rods and curtains in your desired style. Install the curtain rods, then hang the curtains for an instant refresh.

Create an accent wall. An accent wall adds visual interest to a space. Choose a wall in a prominent area of your room. Clean and lightly sand the wall to rough up the surface. Apply 2-3 coats of paint in a color that contrasts the other walls. The accent wall will make a stylish statement in your home.